|
First build a jig for assembling the trusses.
|
||
|
|
|
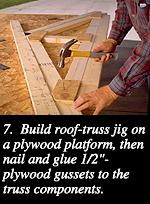
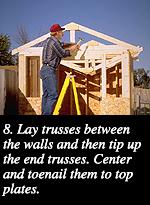
Cut all the pieces for the first truss to fit the space on the jig. Use the first set as a pattern for the rest. Lay the members in place, and nail the joints together with gussets that are made of 1/2" plywood (fig. 7). Use 7d nails and construction adhesive on the gussets. Place gussets on both sides of each truss, except the two end trusses. Mark the wall top plates every 24". Lay the trusses upside down on the walls and then tip up the end trusses and align them with the top plates. Toenail these trusses in place (fig. 8). Run a string between the rafter ends of the two end trusses and align the remaining trusses with this string. When all are toenailed to the walls, plumb the first truss and position the rest of the trusses to match.
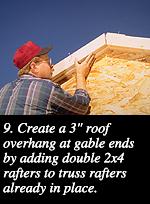
To create an overhang on the ends, nail doubled 2x4 rafters to each end truss rafter (fig. 9). Then, rip 1/4" plywood to fit underneath the rafter ends to create a closed soffit. Finally, sheath the end walls as well as the roof and add the 1x6 fascia (as shown). |
||
![]()
© 1996 by The Hearst Corporation; all rights reserved